
SPE and Browser installation: standalone SPE
In this post, we break down the complexities of the initial installation process of Phonexia Speech Engine (SPE), as a standalone installation. This means the SPE has to be started separately from the Phonexia Browser GUI (unlike in the embedded SPE mode, where Browser starts SPE as its background subprocess).
By the end of the guide, you will be able to start processing your recordings with Phonexia Speech Technologies.
1. Download Evaluation package
Download the Phonexia Evaluation package from https://partner.phonexia.com/kb/sp/speech-platform/evaluation-package/
Simply unzip the package to your desired location. Ideally avoid C:/Program Files as you may face issues later on with previleges
2. Save license.dat file
Copy the license.dat file to the /SPE/ directory.
Make sure the license.dat file is not altered in any way or renamed.
The license is provided upon request by Phonexia sales representative. If you do not have it, contact our sales to arrange the cooperation.
3. Optional: add additional languages
If you are going to test additional languages besides the default English, present in the Phonexia Evaluation package, you need to perform a simple operation of merging the contents of two packages into one.
The additional languages are provided upon request by Phonexia sales representative. If you do not have the languages you want to test, contact our sales to arrange the cooperation.
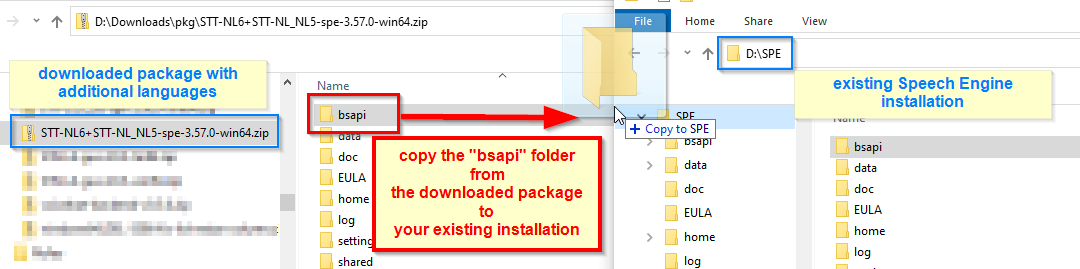
Download the files with additional languages locally and unzip them.
Then copy the additional languages over to where you saved the default Evaluation package. In other words, merge the contents of the /bsapi/ directory with the /SPE/bsapi/
4. Configure Speech Engine
In order to configure the Speech Engine, we have to navigate to /SPE/ directory and start the configuration utility called phxadmin
SPE on Windows
In the /SPE/ directory type cmd in the Address bar, to open the Command line.
In the command line type: phxadmin.exe /configure-tech
SPE on Linux
Open the Terminal window in /SPE/ directory
Type in the terminal: ./phxadmin --configure-tech
This will open the list of technologies (and language models) available for you to chose from
 1) Age Estimation [disabled]
 2) Denoiser Technology [disabled]
 3) Diarization [disabled]
 4) Gender Identification [disabled]
 5) Keyword Spotting [disabled]
 6) Phoneme Recognition [disabled]
 7) Keyword Spotting Stream [disabled]
 8) Language Identification LanguagePrint Comparator [disabled]
 9) Language Identification LanguagePrint Extractor [disabled]
10) Speaker Identification 4 VoicePrint Extractor [disabled]
11) Speaker Identification 4 VoicePrint Comparator [disabled]
12) Speaker Identification 4 VoicePrint Calibration [disabled]
13) Speaker Identification 4 VoicePrint Stream Extractor [disabled]
14) Speaker Identification 4 VoicePrint Stream Comparator [disabled]
15) Speech Quality Estimation [disabled]
16) Speech Quality Estimation Stream [disabled]
17) Speech To Text [disabled]
18) Speech To Text Input Stream [disabled]
19) Time Analysis [disabled]
20) Time Analysis Stream [disabled]
21) Voice Activity Detection [disabled]
22) Voice Activity Detector Stream Technology [disabled]
23) Enable all
24) Disable all
 0) Quit
Choose technology to configure [0]:23
Select the option to Enable all technologies (usually the option nr. 23)
 1) Age Estimation [active model: XL5(1x)]
 2) Denoiser Technology [active model: EN_US(1x)]
 3) Diarization [active model: XL4(1x)]
 4) Gender Identification [active model: XL5(1x)]
 5) Keyword Spotting [active model: EN_US_6(1x)]
 6) Phoneme Recognition [active model: EN_US_6(1x)]
 7) Keyword Spotting Stream [active model: EN_US_6(1x)]
 8) Language Identification LanguagePrint Comparator [active model: L4(1x)]
 9) Language Identification LanguagePrint Extractor [active model: L4(1x)]
10) Speaker Identification 4 VoicePrint Extractor [active model: XL5(1x)]
11) Speaker Identification 4 VoicePrint Comparator [active model: XL5(1x)]
12) Speaker Identification 4 VoicePrint Calibration [active model: XL5(1x)]
13) Speaker Identification 4 VoicePrint Stream Extractor [active model: XL5(1x)]
14) Speaker Identification 4 VoicePrint Stream Comparator [active model: XL5(1x)]
15) Speech Quality Estimation [active model: GENERIC(1x)]
16) Speech Quality Estimation Stream [active model: GENERIC(1x)]
17) Speech To Text [active model: EN_US_6(1x)]
18) Speech To Text Input Stream [active model: EN_US_6(1x)]
19) Time Analysis [active model: GENERIC(1x)]
20) Time Analysis Stream [active model: GENERIC(1x)]
21) Voice Activity Detection [active model: GENERIC_3(1x)]
22) Voice Activity Detector Stream Technology [active model: GENERIC_3(1x)]
23) Enable all
24) Disable all
 0) Quit
Choose technology to configure [0]: 0
Close the technologies configuration by typing 0 and confirm the save by typing y.
This enabled one instance of each technology and each language. Feel free to add more instances for faster processing – either from this phxadmin utility or by modifying the newly created /SPE/technologies.xml file, changing the records of either technology.
For example to add more instances of the LID technology, simply increase the number 1 to for ex. 5:
  <name>DIAR</name>
  <models>
    <item>
      <name>XL4</name>
      <n_instances>1</n_instances>
      <config_file/>
    </item>
  </models>
5. Optional: configure the multimedia converter
By default, the Speech Engine will accept only a limited list of audio formats. In order to process the non-native formats, install a multimedia converter. The recommended SW for this is FFmpeg.
FFMPEG on Windows
Download the latest version from https://www.gyan.dev/ffmpeg/builds/ffmpeg-release-essentials.zip
After unzipping the package, move the ffmpeg.exe executable to the /SPE/ directory.
You can delete the rest of the contents of the ffmpeg-release-essentials package. They will not be needed.
FMMPEG on Linux
run the following commands
sudo apt update && sudo apt upgrade
sudo apt install ffmpeg
Open the /SPE/settings/phxspe.properties file with notepad and change the following lines to enable the FFMPEG convertor:
change the line:
# Enable or disable audio converter
audio_converter.enabled = false
to:
# Enable or disable audio converter
audio_converter.enabled = true
6. Start Speech Engine
In order to start the Speech Engine, start the SPE executable called phxspe
On Windows – type cmd in the Address bar, to open the Command line. In the command line type: phxspe.exe
On Linux – Open the Terminal window in /SPE/ directory. Type in the terminal: ./phxspe
Wait for all the technologies to start. SPE is fully started once you see a message similar to the following:
2023-12-20 15:45:50 [Information] server: Server has been started on 0.0.0.0:8600
7. Configure Phonexia Browser
- from the /Browser/ directory start
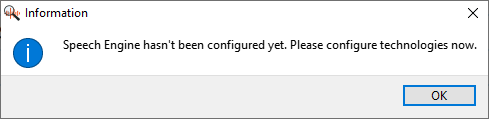
PhxBrowser.exe(on Windows) orPhxBrowser(on Linux) - You should see following the information window. Click OK:
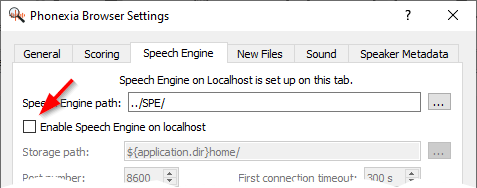
- In the Settings dialog, on the Speech Engine tab, clear the “Enable Speech Engine on localhost” check box and click OK
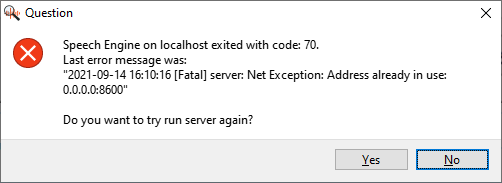
- If you receive the following error message, click “No”:
- Now, right-click into “Sources area” and click “Add new server”

- In the next dialog fill the information and press ok:
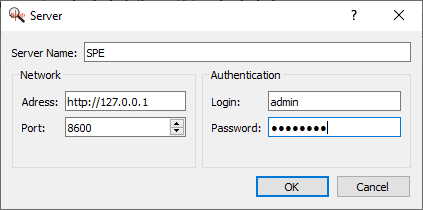
Server Name: Friendly name, under which this server will appear in Sources pane in Browser.
Network: location of your server. If you are running the server locally, use “http://127.0.0.1“
Authentication: SPE default username isadminwith passwordphonexia.
(Note: For security reasons, we recommend changing the password to “admin” user, or creating your own administration account in SPE with your password.) - After that your server will appear in Sources panel. Click on it and you should see that technologies icons are now enabled.

Now SPE will run even if you close Browser. You need to turn SPE off separately by sendingCtrl+Cto its CMD/Terminal window.
8. Process your first recording
To add your recordings, you can simply drag and drop your files over to the main window.
Alternatively, you can add files also by right-clicking in the main window or choosing the button from the top bar.
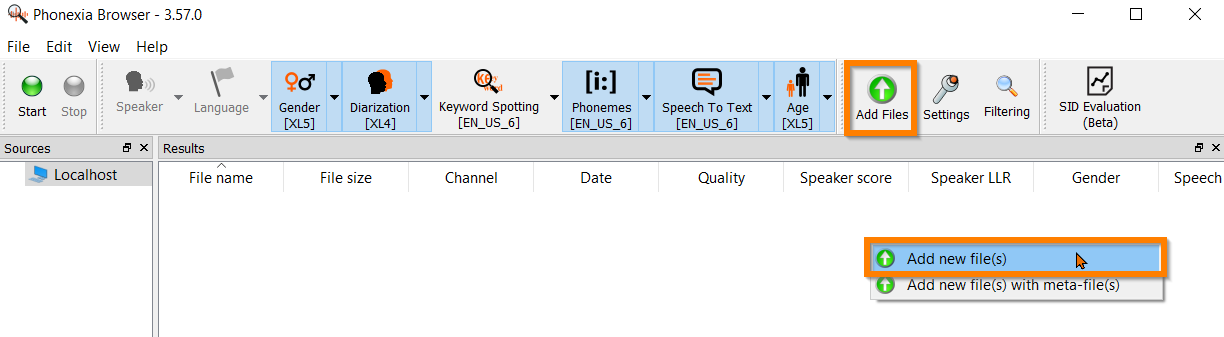
Select the technologies you want to process your recordings with from the top bar.
The background color of the selected technologies will change to indicate they have been selected for use.
Click on the Start button to start the processing.
So here you have it.
Now you can start using the Speech Engine (SPE) with the predefined set of technologies. Make sure you start and close both components (SPE and Phonexia Browser) each time.
Please keep in mind this setup does not cover all the options and configurations available. It is meant for at least a bit skilled user, who is not frightened to see a command line and knows how to stop a process in Command line.
For more please refer to additional resources, such as:
- the PDF manual that is part of the installation (see PhxBrowser_manual.pdf in the /BROWSER/ directory)
- additional documents, inside the /SPE/doc directory
- articles on this Phonexia Partner Portal knowledge base site
- personalized training from Phonexia consultant – contact our sales to arrange the details