
How to Update Orbis on KVM Without Data Loss
This guide assumes that the customer has a working Orbis virtual machine deployed using steps described in the How to install Orbis on KVM article. This guide is very similar to the first one with the exception of keeping the existing data disk rather than adding a default blank one.
Ubuntu 20.04 LTS with default GUI is being used as an example here but other Linux distributions work in a very similar manner.
Step 1 – convert updated OVA template into qcow2 format
Open terminal and navigate to the folder containing updated Orbis OVA template. Extract the OVA file using tar command:
tar xvf orbis-updated.ova
This will create 3 files – an .ovf file which can be safely removed and two virtual disks in .vmdk format.
Convert the first virtual disk ending with -disk001.vmdk to qcow2 format using qemu-img command:
qemu-img convert -O qcow2 orbis-updated-disk001.vmdk orbis-updated-disk001.qcow2
Move the resulting .qcow2 file to a desired directory where the Orbis virtual machine is going to be stored. Rest of the files can be safely deleted.
Step 2 – create a copy of the original data disk
Power off the existing Orbis virtual machine and switch back to terminal. Navigate to the directory where the original Orbis virtual machine is stored and create a copy of the existing data disk, ie. file ending with -disk002.vmdk.
cd /orbis/vm/directory
cp orbis-disk001.qcow2 orbis-updated-disk001.qcow2
Copying the virtual disk instead of using the existing one works as a safety measure. In case something goes wrong during the update, the original Orbis virtual machine remains intact.
In some situations (eg. not having enough disk space) it might be necessary to use the original virtual disk instead of creating a copy. In that case we strongly recommend creating a backup before proceeding in this guide.
We should now have 4 virtual disk files. Two from the original Orbis virtual machine and two disks which will be used to create a new Orbis virtual machine. Screenshot below should make it very clear.

Step 3 – create a new virtual machine
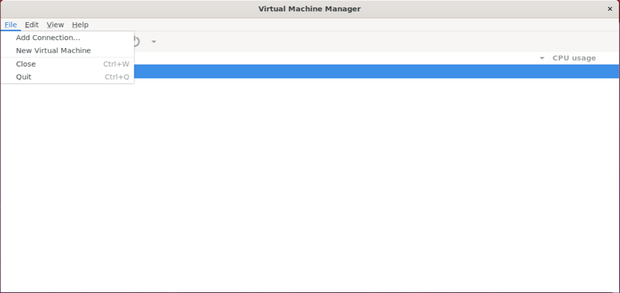
Switch to Virtual Machine Manager (virt-manager) and click File → New virtual machine.
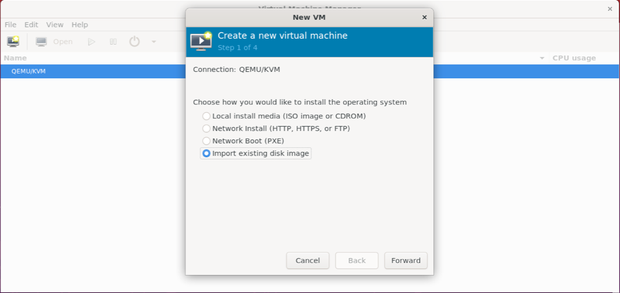
Select Import existing disk image and click Forward.
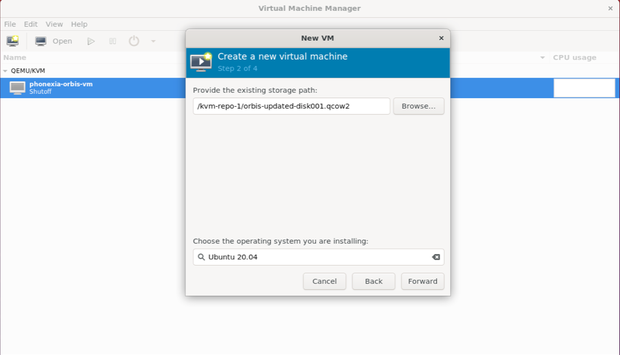
Click Browse… to locate your new Orbis system and application disk or enter the full path manually into the existing storage path field.

Select Ubuntu 20.04 as the operating system and click Forward.
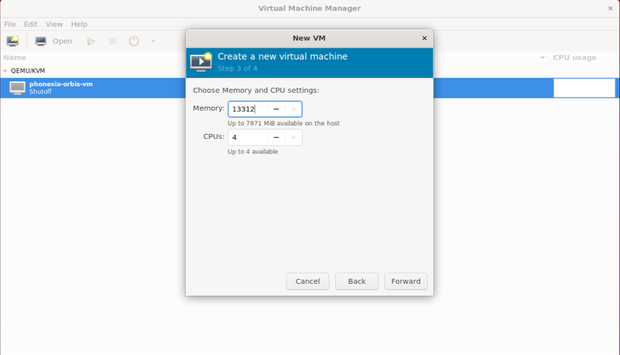
Set up Memory and CPU settings according to your infrastructure.
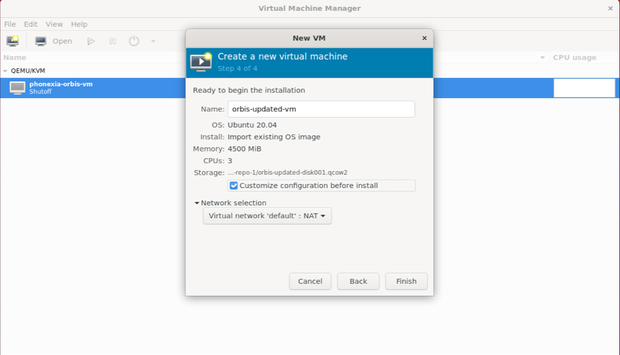
Create a comprehensible name for the new Orbis virtual machine and select the Customize configuration before install checkbox. Click Finish to complete the wizard.
Step 4 – add data disk
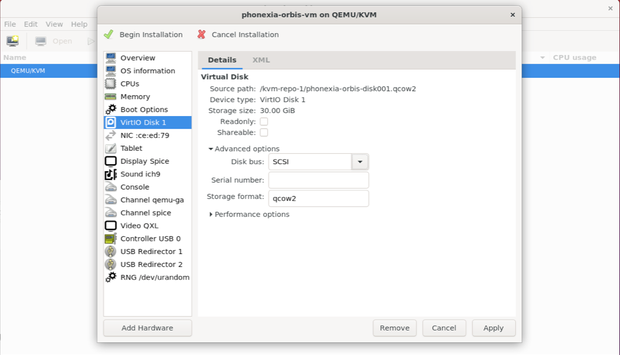
After completing the wizard, a window with virtual machine hardware should open automatically. If not, double click on the newly created Orbis virtual machine and click the Show virtual machine hardware icon in the toolbar.
Select the only existing virtual disk (VirtIO Disk 1 by default) and expand the Advanced options section. Make sure to change Disk bus from VirtIO to SCSI and click Apply.
Then click the Add Hardware button in the bottom left corner and select Storage option on the left side. Click the Select or create custom storage option and enter the path to the second virtual disk. It is the copy of the original data disk created in step 2. Make sure the Bus type is set to SCSI.
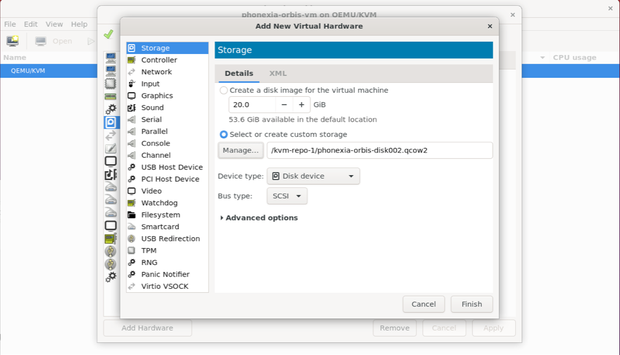
Click Finish to return to virtual hardware overview.
Step 5 – additional settings (optional)
If you’ve performed any other settings to the original Orbis virtual machine, make sure to make the same changes to the new virtual machine so that your new environment matches the original one exactly. This typically involves changing the networking settings according to your environment.
Step 6 – final checks and cleaning up
Click Begin installation in the upper left corner. The virtual machine should start automatically when the process is complete. If it doesn’t, power it on manually. After the machine boots, a login screen should appear with Phonexia logo and obtained IP address.
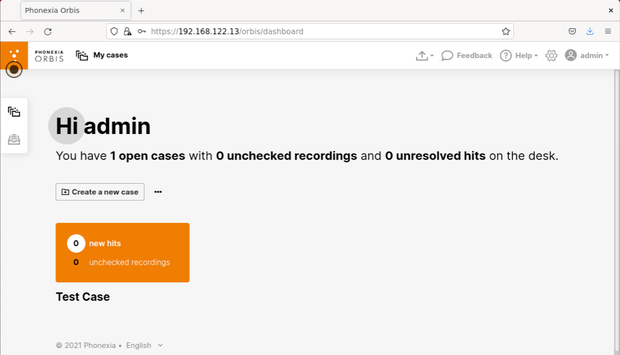
Use the IP address as an address in your web browser and login to Orbis web interface. Make sure all cases and other data have been succesfully transferred to the new virtual machine.
When you’re satisfied with the result, it is possible to safely remove the original Orbis virtual machine. Creating a full backup is strongly recommended before the final removal.
The update process is now complete.