Username: admin
Password: phonexia

This page will guide you through the installation of Phonexia Orbis on your machine.
The following steps describe the installation of Orbis on:
In case of central server installation, additional firewall rules/exceptions may need to be applied according to your IT policy.
First, you will need an installation OVA package downloaded on your computer – follow the instructions on the Download Orbis Trial page.
These instructions apply to VirtualBox. You can download the VirtualBox application for free at www.virtualbox.org
Please make sure to download the latest version. Older versions may contain unfixed bugs resulting in Orbis crashing.
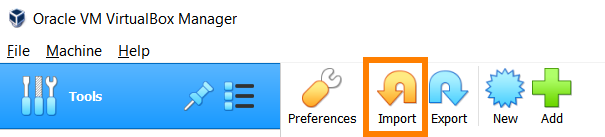
Launch VirtualBox, select Tools, and click the Import icon.
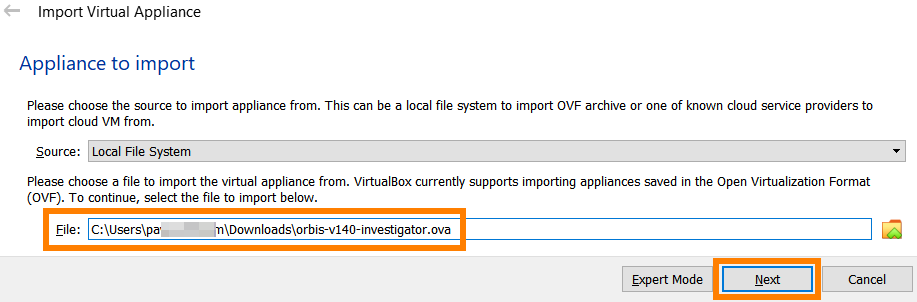
On next page, locate your OVA file and click Next.
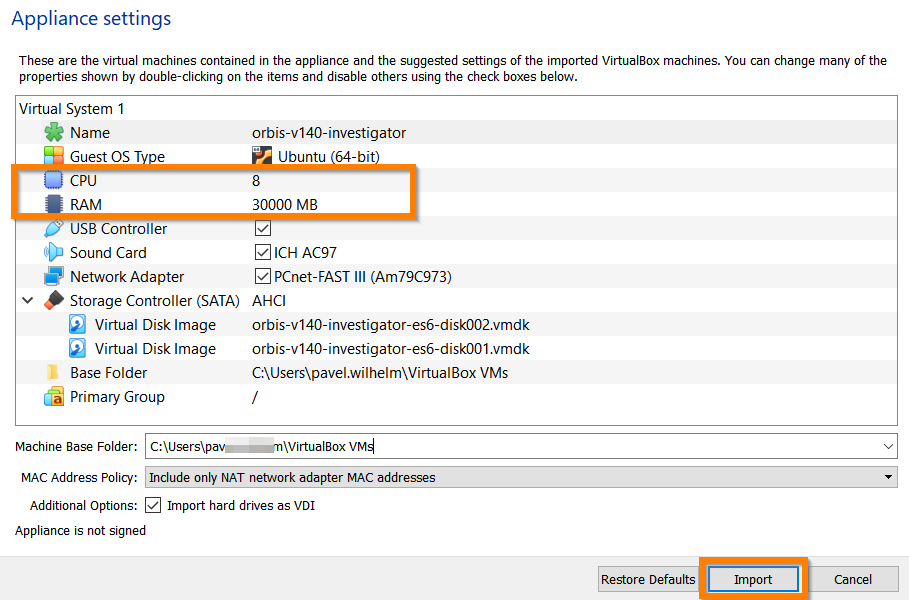
On the Appliance Settings page the minimum HW requirements of 4 CPU cores and 13 GB RAM are prefilled. For the latest version of Orbis 1.4, make sure that you allocate at least 30,000MB RAM, as per the HW requirements page
Note: for testing purposes on a small number of recordings, you may have success running with lower RAM and CPU allocation. But keep in mind, that operating with lower than Phonexia recommended HW setup, no guarantee of operation is provided.
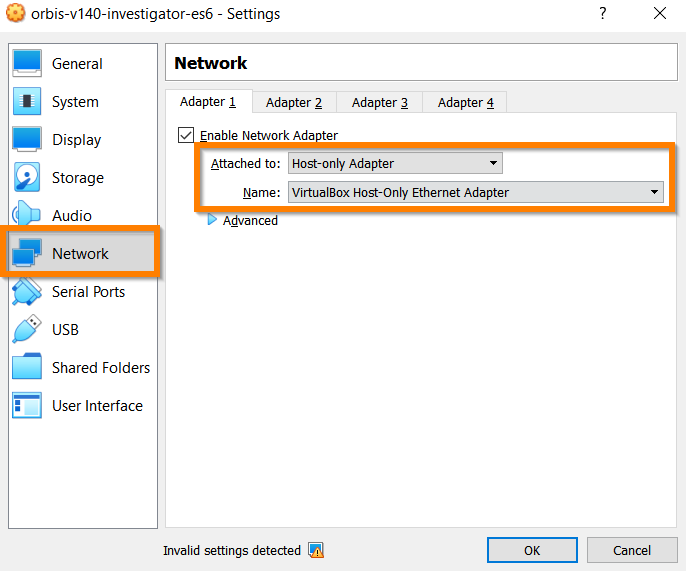
When the import process has finished, edit the Settings of the newly created virtual machine and switch to the Network tab. Change Adapter 1 connection to “Host only adapter”, this setting prevents the guest virtual machine from reaching the public internet but allows your host computer to connect to the virtual.
You should see a window with starting VM.
The first time Orbis is started, we recommend taking a short break to stretch your muscles, or go make a coffee.
The initial start takes around 3 minutes before all files in the background are ready.
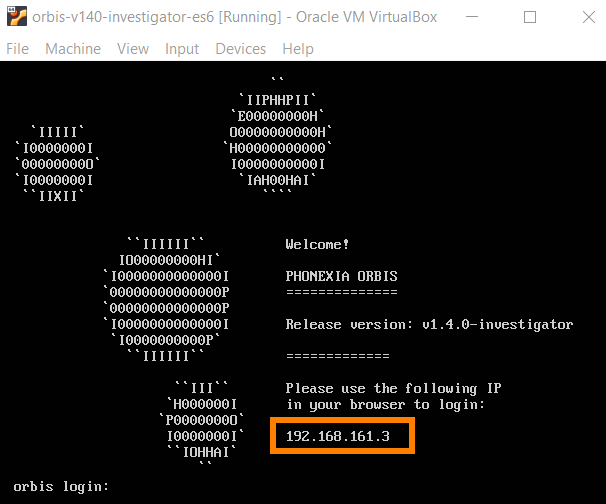
Notice the IP address that Orbis is running on – in this example it is 192.168.161.3
Your IP address will likely be different.
Later starts of Orbis are generally faster. You can now minimize this window.
Open up your web browser and type your Orbis address (in this example it is 192.168.161.3).
In case you see 404 Error, 500 Error or any other, please wait a little longer. This error simply means that the installation hasn´t fully finished yet and some services are still being configured in the background.
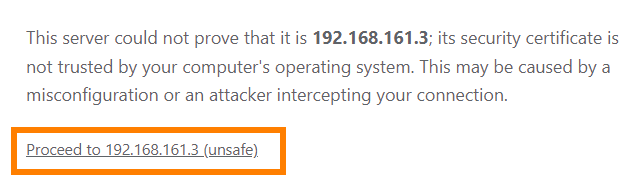
When you see a certificate warning in your browser, click Advanced and click on “Proceed to site”.
This warning is expected behavior – the SSL certificate has to be issued for a specific IP address. Because in Phonexia we do not know what (internal) IP you will be using Orbis on, the IP for which the certificate is issued, will not be the same as the IP you are running it from. This means the certificate cannot be verified as valid. For that reason, you will be warned by the browser.
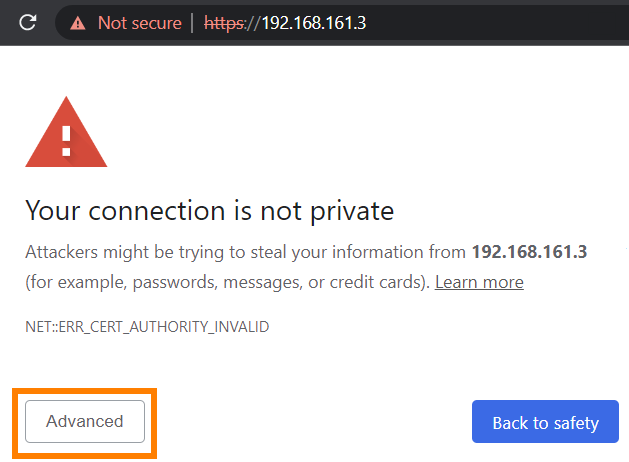
Depending on your web browser, your window may look slightly different. The above screen is from the Chrome browser.
After this, you should see the login screen to the Orbis frontend:
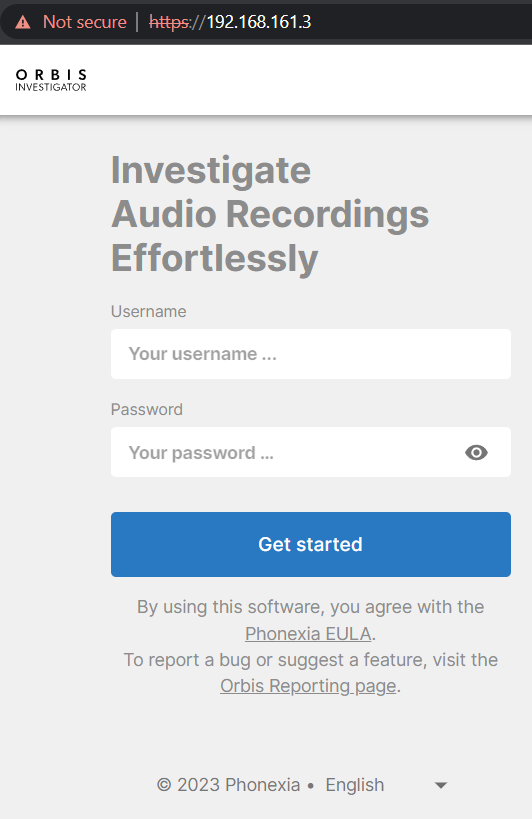
Congratulations, you have now installed Phonexia Orbis on your machine!
In case you installed the Phonexia Orbis on a central server, to which the individual users connect, make sure to enable all the necessary Firewall rules and exceptions. As the steps needed to perform differ based on your IT services and infrastructure, follow your company guidelines to enable connection to the selected IP.
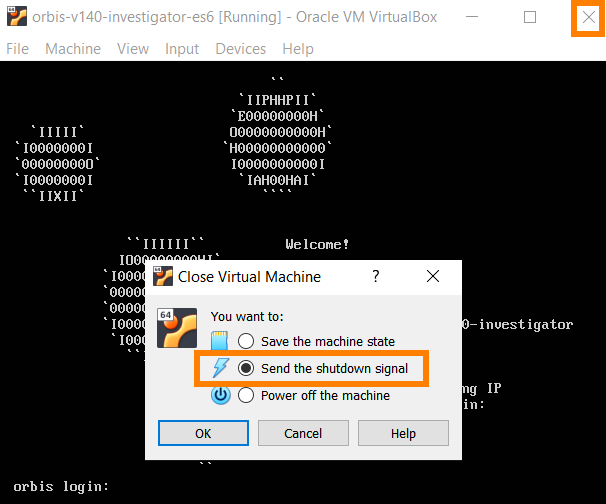
If you want to turn off the Virtual Computer, close the virtual machine window by the X button.
Choose to Send the shutdown signal and press OK.
To start working with the system, follow the Orbis Manual. If you have any problems during these steps, have a look on Frequently asked questions pages or ask your Phonexia contact.
For list of changes and updates, head over to the Release notes.